Construction Waste Management: A Practical Job-Site Guide
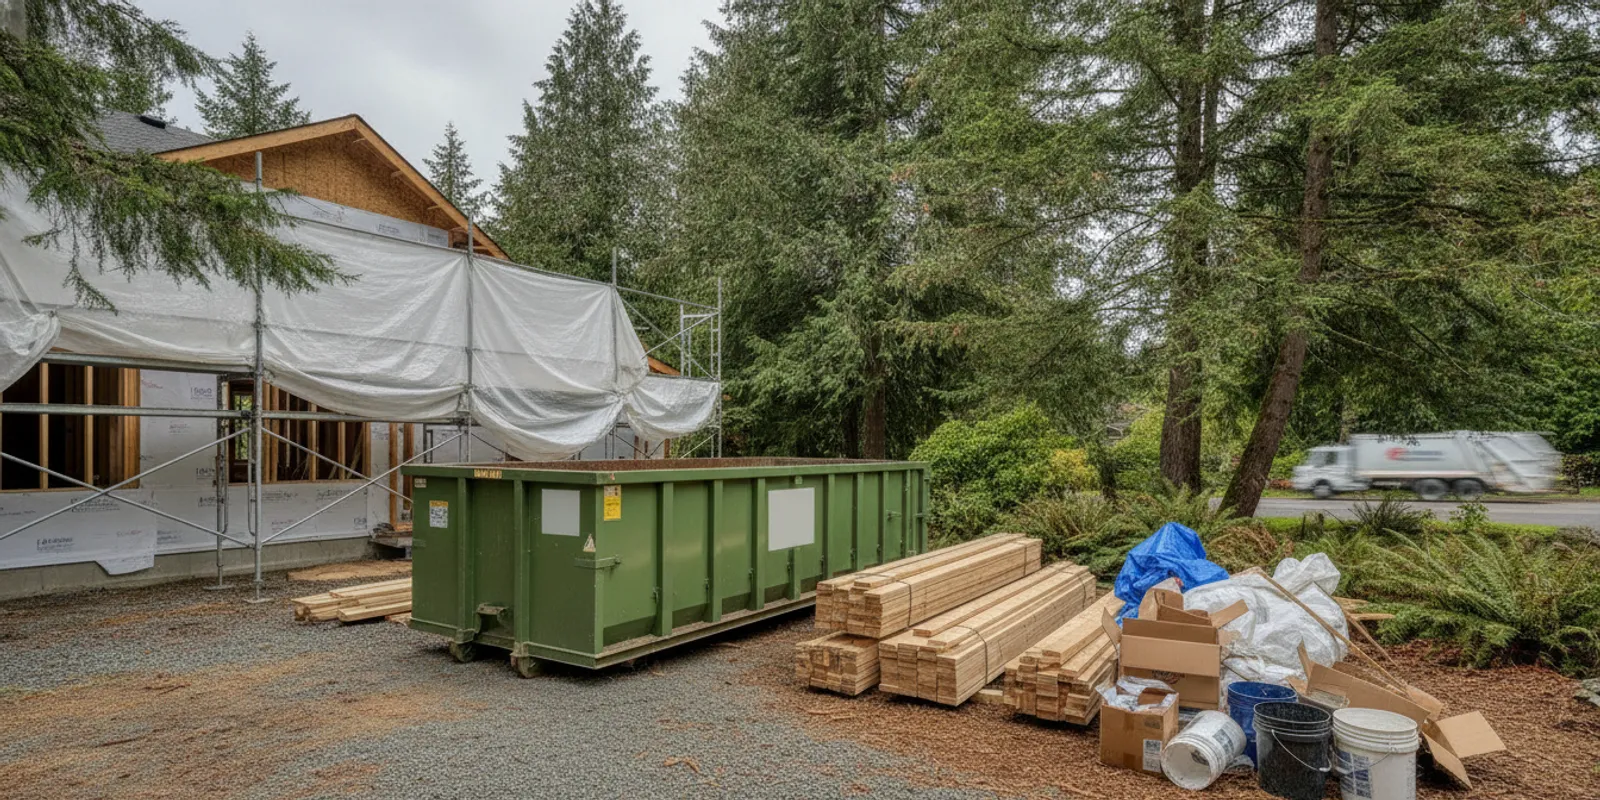
Good construction waste management starts before demolition or renovation begins. Decide what materials the job will produce, separate them where practical, and match each stream to an appropriate disposal route. For projects in King County and Pierce County, planning the debris and the job-site access together can make cleanup more orderly and help you choose whether a dumpster fits the work.
Talk with Get Gawn about your project
What does construction waste management involve?
Construction waste management is the process of planning, sorting, storing, and removing material generated by construction, renovation, and demolition work. It is not just a decision about which container to order. A useful plan identifies what is coming out, keeps unlike materials from being mixed unnecessarily, protects the work area, and sets a clear path for removal.
For a homeowner, that may mean separating old flooring from concrete patio pieces. A contractor might plan for recurring debris from several work areas and coordinate pickup around the job sequence. In both cases, the goal is to make disposal predictable and to avoid discovering at the end that a material needs a different handling route.
The U.S. Environmental Protection Agency describes construction-site waste management as a way to reduce pollution risks to stormwater. Its guidance is a helpful reminder to keep waste contained and manage the site, not just the container: EPA guidance on construction-site waste management. Project specifications can also call for salvaging nonhazardous construction and demolition material, as shown in Southern Methodist University's construction waste management requirements.
How can you plan the waste before work starts?
Walk the project and make a rough material list before the first load is removed. Estimate by type rather than trying to guess an exact weight or volume. Note which materials will come from demolition, which will be packaging or offcuts, and whether any items need separate handling. This first pass helps you spot special cases and gives you a more useful conversation when arranging disposal.
- List the work areas. Write down what will be removed from each room, exterior area, or work zone. A kitchen remodel, a roof replacement, and concrete removal produce different debris, even when they happen on the same property.
- Sort by material. Separate heavy material, general renovation debris, and material that may be reusable or recyclable. Keep the categories clear instead of assuming all project waste belongs together.
- Flag uncertain items. Do not assume that a dumpster is appropriate for every item. Ask the disposal provider or relevant local authority about anything whose handling requirements are unclear. Get Gawn's 15-yard and 22-yard options are for general non-hazardous debris; do not put hazardous waste into those containers.
- Estimate the project sequence. Work out when debris will be generated and whether one container can serve the work or whether the project needs a different plan as it progresses.
- Check the site. Identify where a container could sit, how the delivery vehicle would approach, and whether workers can carry material safely to it.
Make the inventory specific enough to help with the decision. Instead of writing “remodel waste,” note that the bathroom phase may produce tile, fixtures, and flooring, while a later phase may produce packaging and trim offcuts. If the work also includes removing a concrete step or a section of sod, list that separately. This makes it easier to explain which items are heavy materials and which are general debris rather than treating the whole project as one undifferentiated load.
For a larger job, a simple plan can include a column for material, work phase, intended container or route, and questions to confirm. Leave uncertain items marked for follow-up rather than guessing. For a home project, a short written list and a few clearly identified staging areas may be enough. The point is not to create paperwork for its own sake; it is to make the disposal decision visible before people begin loading.
For larger commercial work, assign someone to maintain the plan and tell crews where each waste stream goes. For a home project, a simple written list near the work area can prevent confusion when several people are cleaning up. Keep the plan practical: a sorting system that is too complicated to follow is unlikely to stay useful once demolition is underway.
Which dumpster may fit the material?
Match the container to both the material and how it will be loaded. Get Gawn offers a 7-yard Rock & Dirt Box for specified heavy materials, plus 15-yard and 22-yard dumpsters for general non-hazardous debris. The material distinction matters: concrete, dirt, rock and gravel, brick and block (including mortar), asphalt, and stripped sod are examples for the 7-yard option. Hand-loaded bathroom, kitchen, deck, flooring, roofing, and other general debris projects are suited to the 15- and 22-yard options.
| Project material or task | Option to discuss | Planning note |
|---|---|---|
| Concrete, dirt, rock or gravel, brick or block, asphalt, or stripped sod | 7-yard Rock & Dirt Box | Use the heavy-material option for the listed material types; describe the material and job to confirm the right plan. |
| Bathroom or kitchen renovation debris | 15-yard or 22-yard dumpster | These are for general non-hazardous debris and are hand-loaded. |
| Deck, flooring, or roofing work | 15-yard or 22-yard dumpster | Estimate how much will be removed and consider the work sequence before choosing. |
| Mixed project with heavy material and general debris | Plan separate handling before booking | Do not combine heavy material with general debris by assumption; explain both streams when asking for guidance. |
This table is a starting point, not a substitute for confirming the material and site details. If the project includes materials that are not listed, ask before placing them in a container. Do not assume sand or hazardous materials are accepted. You can compare the available 7-yard Rock & Dirt Box, 15-yard dumpster, and 22-yard dumpster options, or use the dumpster size guide to think through the project.
For example, a renovation might include old bathroom flooring and a separate concrete landing outside. Treat those as distinct lines on the project list, not as a single “construction debris” category. The flooring is general renovation debris, while concrete belongs among the listed heavy-material examples. Explain both streams when asking what setup is appropriate. This avoids choosing a container based only on the room being renovated or on an estimate of total volume.
How do you keep waste streams organized?
Put the sorting decision where the work happens. If there are several work areas, label the intended destination for each material and make sure everyone on the job understands the plan. Keep reusable material out of the debris stream when it is safe and practical to do so, and avoid moving it repeatedly through the site.
- Keep heavy material distinct. Concrete, dirt, rock, brick, asphalt, and stripped sod have a different disposal path from ordinary renovation debris. Do not treat a general-purpose container as interchangeable with the Rock & Dirt Box.
- Keep the container accessible. Place debris in a way that leaves a clear route to the container and does not block doors, access lanes, or active work areas.
- Watch for wind and runoff. Secure loose lightweight material and keep debris from spreading around the site. Follow applicable site requirements for protecting storm drains and preventing waste from washing away.
- Review the load as the project changes. Demolition sometimes exposes additional layers or materials. Pause and check the plan if the waste type changes instead of loading unfamiliar material by default.
Sorting does not mean every material can be recycled in every location. Availability and rules vary, so verify an outlet before setting aside a stream for recycling or reuse. When local project specifications apply, follow them and document where material is directed. This is especially important for commercial work, where the owner, contractor, or permit conditions may set waste-handling requirements.
Choose a staging approach that fits the work area. If multiple crews are working in separate rooms, designate a collection point for each material category or have one clearly explained route to the container. Keep a note or label at the point where debris is generated, not only in an office or on a schedule. That small cue can reduce accidental mixing when cleanup happens quickly at the end of a shift.
Use a brief check at the transition between demolition and rebuild. Ask whether the material coming out has changed, whether the planned route still works, and whether the access area remains clear. A short review is particularly useful when a project uncovers extra layers or adds outdoor work that was not part of the initial scope. If a new material does not match the confirmed plan, pause loading and ask how it should be handled.
What should you check about delivery and placement?
A container plan only works if it can reach the site and sit in a useful location. Measure the available area and think through the full approach: gate openings, turns, overhead obstructions, slope, parked vehicles, and the path the delivery truck would need to take. Also decide how workers will carry debris without crossing an unsafe route.
Get Gawn's containers may fit some locations where a full-size roll-off truck cannot, such as an alley, parking garage, behind a building, or a dead-end driveway. That is a possibility, not a guarantee. Describe the approach and restrictions so the team can confirm whether the location is workable before scheduling. For doorstep delivery, keep the planned placement area clear and tell the provider about any site conditions that could affect access.
Before booking, confirm the delivery and pickup plan, the material you intend to load, and any site-specific requirements. If a project changes after delivery, contact the provider to discuss the revised plan rather than treating the original arrangement as approval for a different material or use. Get Gawn serves residential and commercial customers in King County and Pierce County; check the service-area information for coverage details.
Walk the route as if a delivery were happening that day. Note anything temporary that could be moved, such as a parked vehicle or a pile of supplies, and anything fixed that cannot, such as a narrow turn or overhead obstruction. Then consider how the placement will work during the project, not just at drop-off: workers need a safe, reasonably direct path from the work area, and the container should not block necessary access. Sharing these details up front gives the provider a more complete picture than naming only a street or driveway.
How can you control project cost and avoid surprises?
Ask what determines the total charge before choosing a disposal approach. Clarify the rental price, what disposal charges depend on, which materials are allowed, what happens if the job needs more time, and whether a second container or separate material stream is needed. Transparent terms make it easier to compare a dumpster with other approaches on the basis of the actual project rather than a headline price.
Estimate carefully, but do not try to solve uncertainty by overfilling a container or adding material that was not part of the plan. Tell the provider what the job is producing, especially if the load will include dense material. Keep the agreed material limits and loading instructions available to the crew. If your project is a construction or renovation job with several debris types, you can review Get Gawn's construction dumpster rental guide as another planning resource.
A simple checklist can make the booking conversation more efficient:
- Project type and approximate start date.
- Material types and whether heavy materials are part of the job.
- Expected debris volume, described in practical terms rather than an unsupported exact weight.
- Delivery location, approach, and any access restrictions.
- Preferred timing for removal and what to do if the schedule changes.
- Any local, property-owner, or project-specification requirements that apply.
For questions about the process, consult the Get Gawn frequently asked questions or reach the team directly. If you are comparing dumpster sizes for a specific renovation, the kitchen remodel size guide gives a project-focused example of the general-debris decision.
How can you keep the plan working through the project?
A waste plan should be checked as the job moves from demolition to installation and finish work. The material mix often changes by phase: a room may produce heavier demolition debris first, then lighter packaging and offcuts later. Review the plan at the start of each phase so the crew knows whether the same disposal route still applies. If a newly uncovered material is not on the original list, stop and confirm its handling rather than guessing.
For a contractor or property manager, make one person responsible for coordinating the waste area. That person can keep the container approach clear, remind crews of the material separation plan, and pass along schedule changes. On a homeowner-led project, the same idea can be simple: keep a short checklist visible and agree who will call if the work produces something unexpected. Clear responsibility prevents the container from becoming a catch-all simply because the job is busy.
At the end of each workday, take a quick look around the site. Check that debris has not spread into walkways or drains, lightweight pieces are contained, and materials intended for reuse or separate recovery have not been mixed in with disposal debris. A tidy, accessible work area makes it easier to continue the job safely and see whether the plan needs adjustment.
Before the final removal, confirm that the project is actually ready for pickup and that no crew still needs the container. Do not leave a change of material or timing uncommunicated. If there is a new phase, a change in access, or an unexpected quantity, contact the provider and agree on the next step before loading continues. These small check-ins are easier than trying to resolve a mismatch after the work is complete.
It can help to keep a simple running record as the work progresses. Note when a material category changes, what questions were raised, and who confirmed the next step. This does not need to be a formal report for a small home project; a few checklist marks or a brief job note can keep everyone aligned. On a multi-phase job, those notes also help the person coordinating cleanup explain the current situation if a different crew takes over.
Use the end-of-phase review to match the remaining debris against the original plan. If the project has shifted from interior demolition to exterior work, for instance, revisit the list rather than assuming the original container choice covers every new material. Check what remains to be removed, what still needs to be loaded, and whether the placement area is accessible for the expected pickup. Then communicate any change before it becomes a last-minute issue.
Frequently asked questions
Can I put all construction debris in one dumpster?
Do not assume every material can share one container. Get Gawn positions its 15-yard and 22-yard dumpsters for general non-hazardous debris and the 7-yard Rock & Dirt Box for listed heavy materials such as concrete, dirt, rock, brick, asphalt, and stripped sod. Explain the material mix before booking and confirm how it should be handled.
Which Get Gawn dumpster is intended for concrete or dirt?
The 7-yard Rock & Dirt Box is the option for specified heavy materials, including concrete and dirt. Share what the work will produce and where the container needs to go so the team can confirm that it fits the job and site.
Are hazardous materials accepted?
Do not place hazardous waste in the 15-yard or 22-yard dumpsters, which are for general non-hazardous debris. Ask the relevant local authority or a qualified disposal provider how to handle any material you suspect may be hazardous, and confirm uncertain items before loading.
What if a dumpster has to go in a tight location?
Some Get Gawn containers may fit areas such as an alley, parking garage, space behind a building, or dead-end driveway, but fit depends on the site and truck approach. Describe the access, obstructions, and intended placement so feasibility can be checked before scheduling.
Plan your construction or renovation cleanup
Make waste management part of the job plan
Construction waste management is easier when material sorting, container choice, access, and removal timing are considered before work begins. Identify what the project will produce, keep heavy and general debris distinct, and confirm unusual materials and tight placement conditions in advance. For a project in King County or Pierce County, contact Get Gawn to discuss the material and site and choose an appropriate next step.